


How to use Power Automate Word Templates with ALM

Word Templates, a subject that I love. I’ve covered how to use Word Templates with the Power Automate Word Connector before, but just like with D365 Word Templates, ALM is not easy.
What is ALM? ALM means Application Lifecycle Management, and it’s the process of deploying changes from Dev/UAT/staging environments through to production and is at the heart of healthy applications.
From the Dynamics 365 world, we tend to use Solutions to move objects from one environment to another. Last year we got a new ALM object for solutions called Environment Variables which allow you to store data and use it in Power Automate and Power Apps. This data can be updated per environment and are one of my favourite tools in the last year.
Scenario
Working with a customer who has Dev->UAT->Production Environments and you need to move a Word Template, that will be populated by a flow, through each one of these environments without manually updating the flow each time and hardcoding in the values.
Problem
The Word connector connects to either SharePoint or OneDrive for business (because it’s based on SharePoint) and that’s where we will be storing the template. There is a Datasource environment variable which can be used to specify the SharePoint Site and List. But, we need to specify the Site, document library and identify the correct document.
Solution
This solution requires a bit of setup, but once it is done, you can update your Cloud Flow and move it quickly and easily through all of your environments, with no manual intervention needed.
Start by building your flow with whatever trigger you wish. Store your Word Template in SharePoint or OneDrive for Business. Choose the correct SharePoint site (location), document library and file through the UI.

You can also fill in any of the data in the template as well.
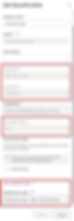
Click the ellipsis and then choose “Peek Code” and this will switch you to a view of the code behind the action itself. We need to grab 2 values, the “drive” and the “file”. We are going to store these as environment variables. We do not need the “source” as we will be using a different environment variable for that and don’t need the guid.


Save your flow and go back to your solution. We are now going to create the 3 environment variables that we need. Create a new environment variable of type Datasource, give it a name and choose a site and for the default value, choose the site in your current “Dev” Environment where you stored your Word Template. Save and close this environment variable.
Create 2 more environment variables, both of type text and give them both names. Add the GUID from the “drive” and “file” you got from the “Populate a Microsoft Word Template” step earlier.


Go back into the flow and now replace the SharePoint site (location) with the datasource environment variable we created first. Then the Document library and File environment variables and you should get something that looks like this. The custom values are environment variables, they just look like this when you choose "Custom Value" and insert the environment variables.

Save your flow and export your solution.
Go to your next environment, so maybe your UAT environment and create a quick flow with a “Populate a Microsoft Word Template” action. Choose your SharePoint site (location), Document Library and file for where you have uploaded the same Word template in this new environment. Choose Peek code again and copy the “drive” and “file” GUIDs again. You can exit this flow without saving
Import your solution into the new environment. Once it is imported, open up the environment variables and update them with a current value. The SharePoint Site (location) datasource variable, you will just choose the new site from the list. The other two environment variables, update them with the GUIDs you just got.

Turn the flow off and back on again (this is a current limitation with flows and environment variables) and this will let the flow pick up the new current value for the environment variables.
Test the flow! The flow should pick up the new environment variable values and it’s able to translate this into finding the correct word template. Future imports of the flow will not need to update the environment variables or be switched off and on again, it’s just the initial import to setup the correct values for that environment.
Shout out to Elaiza Benitez checked my homework above as she had recently implemented this for a customer. Go check out her YouTube channel for lots of awesome Power Automate videos
Ciao for now!